PaulaMS' Giveaways, Reviews, and Freebies
  • Blog
  • Media Kit
  • Rules & Disclosure
  • Email Sign Up
  • Giveaway URL Reporting
  • Secret Word Page
  • Preferred Giveaway Ambassador
  • PaulaMS' Host and Co-Host Entries
  • Daily Dazzle Link Up

Family Favorite Cookie and Cheesecake Recipes

12/20/2015

Comments

 
Baxley Family Reunion 2015 Picture
Baxley Family Reunion 1987 Picture
Mama Fine 100th Birthday with 5 of her Great Great Grandchildren
Family Picture Taken in 1988
At my Parent's 50th Anniversary Party Picture
My Grandmother (Teta) Picture
My Oldest Son Joey
My Children from Left to Right: Jamie, Robert, Christine, and Bobby
Picture
Picture
From Left to Right: Robert, Christine, my Grandmother (Mama) Jamie, and Joey

I have been blessed to be surrounded by a large family. I've always have the luxury of knowing that I was loved and had someone in my corner. Over the years I've lost some of the most wonderful people and would not have made it without the support of the great people in my life. Each one touch my life in such a deep and everlasting way that there are not words that can fully express what they meant to me.

Two of  those who I've lost passed on two great cookie recipes that my family has enjoyed making for years. I remember enjoying both of my grandmothers' cookies and looked forward to them every year. I would like to share their recipes with you in hopes they they will become a favorite of yours and bring you fond memories, also.

Picture
Paula's Family Sugar Cookie Recipe From Mama

Cookie Ingredients:

2 C All Purpose Flour                     2/3 C Shortening
3/4 tsp baking power                    2 Eggs
1/4 tsp salt                                       3/4 tsp Vanilla
3/4 C Sugar                                                                                                            

Let's Bake!
1.    Preheat oven 400 degrees F.
2.    Sift dry ingredients together into large bowl.
3.    Cut in shortening.
4.    Add eggs & vanilla, mix well.
5.    Roll out very thin on floured board and cut with floured cookie cutter(s).
6.    Place cookies on Greased or parchment lined cookie sheet & Bake for 9 - 12 minutes, until edges are just starting to brown. Transfer to rack to cool.

​Icing Ingredients:
1 1/2 C Sifted Confectioners Sugar                                                     1 Tbsp Milk
Food Coloring
​
Let's Decorate!
1.    Sift Confectioners Sugar into a bowl & Add milk. Stir until smooth.
2.    Divide into separate bowls & Color as desired.
3.    Spread icing onto cooled cookies & Add any decorations you want.

Makes about 4 dozen cookies
​
Picture
Paula's Family Italian Cookie Recipe From Teta

Cookie Ingredients:
12 - 14 C All Purpose King Arthur Flour                                               2 C Milk
10 Tbls Baking Powder                                                                            1/4 C Vanilla
2 Tbls salt                                                                                                   2 C Olive Oil
12 Eggs                                                                                                        2 C Sugar

Let's Bake!
1.    Preheat oven 375 degrees F
2.    Sift flour and set aside.
2.    You will need a very large bowl to make this recipe. Into it using a large sturdy spoon mix eggs, milk, vanilla, oil, sugar, and salt. 
3.    Mix in baking powder two tablespoons at a time. Make sure that it is fully incorporated before adding the next two.
4.    Stir sifted flour two cups at a time into wet ingredients. Mixing completely between each addition. Check dough after 12 cups. You should be able to roll the dough into "ropes" with floured hands.
4.    If dough is to sticky, add more flour.
6.    Roll and shape pieces of dough into any shape you like. My favorite growing up were the candy cane shaped ones.
7.    Place cookies on greased cookie sheet & bake for 10 - 12 minutes, until edges are just starting to brown. Transfer to rack to cool.

We have always mixed these by hand.

​Icing Ingredients:
1 Box of Confectioners Sugar                                                     Milk
Food Coloring                                                                                 Sprinkles
​
Let's Decorate!
1.    Sift confectioners sugar into a bowl & add milk. I start with 1 box of sugar and add 1/4 cup milk. Stir until smooth. Then, I add a small amount of milk until it is just thin enough that I can dip the cookie tops in.  
2.    Divide icing into separate bowls & color as desired.
3.    Dip cooled cookies into icing & add any decorations you want. Put cookies on paper bags or wire racks until the icing sets up.

Makes 5 pounds of cookies
​
Picture
Paula's No Bake Cheesecake Recipe

This recipe is a favorite of my children. One year they ate 3 of these!

I've made this recipe and poured it into those little mini phyllo (fillo) cups to take to parties. You can change it up by substituting the vanilla with other extracts and also caramelizing the sweetened condensed milk makes for a delicious caramel cheesecake.


Ingredients:
8 oz Cream Cheese                                                           1/3 C Lemon Juice
1 Can Sweetened Condensed Milk                                1 tsp Vanilla
Graham Cracker Pie Crust            

Let's Bake!
1.    Cream the cheese until light and fluffy. When you think it's light and fluffy do it for another minute.
2.    Add the milk and mix on high until smooth.
3.    Add the lemon juice and vanilla, mix again until smooth. 
4.    Immediately pour into pie crust and chill at least two hours.
5.    Cut and Serve with your favorite topping.

I've always used a hand held mixer for this recipe, measured all my ingredients and had everything open and ready before starting to mix. If using a stand mixer you may need to power it down one speed so that things don't fly out the bowl.

Picture
Comments

Sharing Some Great Recipes: Ginger Teriyaki Chicken - ​Bread and Butter Pickles - DIY Cinnamon Butter - DIY Apple and Pumpkin Pie Spices

10/24/2015

Comments

 
Sharing Some Great #Recipes: Ginger Teriyaki Chicken - ​Bread and Butter Pickles - DIY Cinnamon Butter - DIY Apple and Pumpkin Pie Spices
I received some great spices from Kazu and wanted to share some recipe ideas with you.
​

Picture
Ginger root, with its ancient history and immense health benefits, has been hailed by many cultures as a spice of the heavens.

It is the most widely used and available herbal remedy on the planet, with billions of people using it every day as both food and medicine.


I really enjoyed the flavor that this ginger added to my Teriyaki Ginger Chicken. I gave some to my Aunt for making her Ginger tea. She said with just a bit of honey it made a perfect cup of tea that she thoroughly enjoyed.

Check Out My Recipe Below!
​
About Kazu ® 100% Organic Certified
  • Their Ginger Powder is made from Sri Lanka finest ginger roots. The ginger roots are dried and then pulverized into powder.
  • 100% USDA Certified Organic and grown with sustainable organic methods.
  • 80 mesh (for more fine texture) and Grade A quality ginger root with a spicy and strong flavor.
  • Add Ginger Powder to boiled water to make tea or use it to flavor your food as a spice. You may use it to prepare snacks, candies, bread, soup, meat and vegetable dishes.
  • Ginger powder is loaded with essential oils such as gingerol and zingerone. Also, it contains minerals including copper, potassium and magnesium.
​​

​Ginger Teriyaki Chicken

INGREDIENTS:
  • 1⁄2 cup teriyaki sauce
  • 1 (8 ounce) can pineapple chunks in juice, undrained
  • 1/4 teaspoon Ginger Root Powder
  • 3 garlic cloves, finely chopped
  • 1⁄4 cup green onion, chopped
  • 2 tablespoons oil, divided
  • 1 (14 ounce) package frozen asian-style vegetables
  • 1 lb chicken thigh, boneless and skinless, cut into 2 x 1/2-inch slices
  • 1 (14 ounce) can bean sprouts, drained
  • 1 (8 ounce) can sliced water chestnuts, drained

DIRECTIONS:
  1. Stir together teriyaki sauce, pineapple with juice, ginger, garlic and green onion in small saucepan.
  2. Heat to a boil; reduce heat and simmer 5 minutes.
  3. Heat 1 tablespoon of the oil in large skillet or wok over high heat.
  4. Cook and stir vegetables about 4 minutes or until crisp-tender.
  5. Remove from skillet; set aside.
  6. Pour the remaining 1 tablespoon oil in skillet.
  7. Cook and stir chicken about 4 minutes or until no longer pink.
  8. Add cooked vegetables back to skillet.
  9. Stir in bean sprouts, water chestnuts and prepared sauce; heat through.
  10. Serve over rice or noodles.

I made this the other night substituting the frozen vegetables for some fresh broccoli, carrots, onion, zucchini, and yellow squash that I had in the refrigerator. I just cut them into bite size pieces and cooked until they were tender but still firm like we like them.
​
Kitchen Bowls Utensils Border Divider

Turmeric is an old Indian spice with a peppery, warm and bitter flavor and a mild fragrance slightly reminiscent of orange and ginger. 

​
It contains a powerful medicinal compound called Curcumin and has long been used as a powerful anti-inflammatory in both the Chinese and Indian medicine.

To get the health benefits that this spice offers I like to add it to many of my dishes. Some of my favorites are gravy, rice, fried chicken, and stir fry. I also add it to both my store bought and homemade pickles. I loved the nice peppery taste that this turmeric offered and would recommend adding it to any dish that you want to have or don't mind having a yellow tint. ​

Check Out My Recipe Below!
​
About Kazu ® 100% Organic Ceylon Ground (Curcumin) 
  • Kazu ® 100% Organic Ceylon turmeric has a sharper aroma and finer taste than the more common turmeric. Ceylon turmeric is grounded from the finer Curcuma Longa plant in Sri Lanka, while other turmeric is grounded from cheaper plants in China and India.
  • Kazu ® Organic High Purity Tumeric has higher purity and 80 mesh so it is much finer and pure than other brands.
  • Their Tumeric can be used in curries, meat and vegetable dishes, and soups.
  • Ceylon Tumeric can also be added to baked products, yogurt,juices,bread, gelatins and more.
#DIY Homemade ​Bread and Butter Pickles #Recipe

Homemade ​Bread and Butter Pickles

INGREDIENTS:
  • 25 cucumbers, thinly sliced
  • 6 onions, thinly sliced
  • 3 cloves garlic, chopped
  • 1/2 cup pickling salt or Kosher salt (regular table salt has additives in it that will turn the pickles dark and muddy the color of the pickle juice)
​​
  • 3 cups cider vinegar
  • 5 cups white sugar
  • 2 tablespoons mustard seed
  • 1 1/2 teaspoons celery seed
  • 1/2 teaspoon whole cloves
  • 1 tablespoon ground turmeric

DIRECTIONS:
  1. In a large bowl, mix together cucumbers, onions, garlic, and salt.  Leave enough room to cover the bowl with a thin towel (not the fuzzy kind) and add an inch or two of ice on top of the towel. Allow to stand approximately 3 - 4 hours.
  2. In a large saucepan, mix the cider vinegar, white sugar, mustard seed, celery seed, whole cloves and turmeric. Bring to a boil.
  3. Drain liquid from the cucumber mixture and rinse. I rinse mine 3 times.
  4. Add the cucumbers to the liquid in the saucepan. Bring to a boil again.
  5. Transfer cucumbers to sterile containers. Top with liquid leaving 1/2 inch head space. Seal and chill in the refrigerator until serving or PROCESS in boiling water canner for 15 minutes.
  6. For best flavor, allow pickles to stand for 4-6 weeks.

I did a small batch Saturday without onions to use up some left over cucumbers from my parents anniversary party.
​
Kitchen Bowls Utensils Border Divider

Cinnamon is used to help treat muscle spasms, vomiting, diarrhea, infections, the common cold, loss of appetite, and erectile dysfunction (ED).
​ 
It may even lower blood sugar in people with type 1 or type 2 diabetes.

With the baking season fast approaching it was time to make my favorite go to spices. For me it's both apple and pumpkin pie spice. I use them in more than just my pies since they add great flavor to egg nog, sweet potatoes, baked apples, cobblers, and more. This was my first time trying Ceylon Cinnamon and I really enjoyed the intense sweet flavor  that this cinnamon offers. Even my boyfriend was able to notice a difference when I put some on his sweet potato the other night. I am going to be making some cinnamon butter and using it for everything that I can think of to add it to! ​

Check Out My DIY Recipes Below!
​
About Kazu ® 100% Organic Herb Powdered
  • Kazu ® Organic Ceylon Cinnamon has a sharper aroma and sweeter taste than the more common cassia cinnamon. Ceylon cinnamon is known as the "truth cinnamon", while cassia cinnamon is known as the more common and cheaper variety.
  • Kazu ® Ceylon Cinnamon is loaded with anti-oxidants including poly-phenols. Cinnamon also has anti-inflammatory properties.
  • Kazu ® Ceylon Cinnamon is made from the tree barks of Cinnamomun. The bark is extracted and when it dries, cinnamon sticks form , which are then pulverized to make cinnamon powder.
  • Ceylon Cinnamon is loaded with anti-oxidants including poly-phenols. Cinnamon also has anti-inflammatory properties.
#DIY Homemade Apple Pie Spice #Recipe

Homemade Apple Pie Spice

INGREDIENTS
  • 1 tablespoon ground cinnamon
  • 1 teaspoon ground nutmeg
  • 1 teaspoon allspice
  • 1⁄2 teaspoon ground cloves
  • 1 dash cardamom (optional)
DIRECTIONS
  1. Place all ingredients in small, sealable container and mix together. Use as directed in recipes that call for apple pie spice.
  2. Store in a dry place, up to 6 months.
​
#DIY Homemade Pumpkin Pie Spice #Recipe

​Homemade Pumpkin Pie Spice

INGREDIENTS​
  • 3 tablespoons ground cinnamon
  • 2 teaspoons ground ginger
  • 2 teaspoons ground nutmeg
  • 1 ½ teaspoons ground allspice
  • 1 ½ teaspoons ground cloves
DIRECTIONS
  1. Place all ingredients in small, sealable container and mix together. Use as directed in recipes that call for pumpkin pie spice.
  2. Store in a dry place, up to 6 months.
​
#DIY Homemade Cinnamon Butter #Recipe
Homemade Cinnamon Butter

INGREDIENTS
  • 1⁄2 cup sweet cream butter (softened, salted)
  • 1⁄3 cup confectioners' sugar
  • 1 teaspoon ground cinnamon
DIRECTIONS
  1. In a small bowl, with a handmixer, beat butter till fluffy.
  2. Add confectioner's sugar a little at a time, blending well.
  3. Add cinnamon to mixture and blend well.
  4. Scoop into a small container-serve immediately or refrigerate.
​
Kitchen Bowls Utensils Border Divider

​This spicy seasoning can boost your metabolism, ease indigestion, and even fend off garden pests.

With cooler weather quickly approaching it's time to start thinking about making your favorite chili. I did just that using this great organic chili powder. It added a hearty and robust flavor to my pot plus I only had to use about half the amount that I normally do with the one that I get off the shelf at my local grocery store. I am very please with the taste and quality of this product. 

Check Out My Recipe Below!
​
About Kazu ® 100% Organic Certified (Extra-Hot)
  • 100% USDA Certified Organic and grown with sustainable organic methods.
  • Grade A quality chili powder. 80 mesh powder instead of 60 mesh powder allows for maximum mixing into cooking.
  • Cooking: Use it many different cuisines such as American, Tex-Mex, Chinese, and Korean. Use as a spice for these dishes to add pungency and piquancy.
  • Over 40% of your recommended Vitamin A intake and about 8% of Vitamin C intake.
 #DIY Homemade Easy Blue Ribbon Chili #Recipe
Homemade Easy Blue Ribbon Chili

INGREDIENTS
  • 1 pound fresh ground beef
  • 1 (46 ounce) can tomato juice
  • 1 (15 ounce) can red kidney or pinto beans, drained
  • 1 medium-large onion, chopped
  • 1 (6 - 8 ounce) can or jar sliced mushrooms, drained
  • 1/8 - 1/4 cup chili powder (use less for milder chili)
  • 1/2 teaspoon ground cumin
  • 3/4 teaspoon garlic powder
  • 1/2 teaspoon salt
  • 1/4 teaspoon ground black pepper
  • 1/8 teaspoon cayenne pepper (use less for milder chili)

​DIRECTIONS
  1. In a large skillet, brown the ground beef and onions
  2. Drain off the fat
  3. Put the beef mixture and the remaining ingredients in a 6-quart pot
  4. Cover the pot and let the chili simmer for 1 to 1 1/2 hours, stirring every 15 minutes. You can also cook in a slow cooker on low for 3 to 4 hours.
I like to top mine with a bit of green onion and shredded cheese.
​
Comments

Make Great Pancakes & Cornbread With These Gluten Free Products

10/14/2015

Comments

 
Picture
A new brand of baking mixes that promises of flavor, texture and quality that no other gluten-free baking mixes can offer. 

Picture
Great for all kinds of cooking and baking, all purpose flour is a staple in any home’s kitchen. And with Our House™, you can rest assured that their Gluten-Free All Purpose Flour will make all of your gluten-free recipes delicious.  ​
Picture
Cornbread is a classic accompaniment to a variety of meals, and with Our House™, you have the added benefit of making it gluten-free. Our House Gluten-Free Cornbread Mix makes the cornbread your family loves, without the gluten.
​
Ourhouse
Gluten-Free Cornbread

Ingredients:
  • 1 box Our House Gluten-Free Cornbread Mix
  • 1 ½ cups of milk (or milk alternative)
  • 2/3 cup of oil
  • 3 large eggs (or egg replacer or 1 cup of applesauce)

Preparation Instructions:
  1. Preheat oven to 400F.
  2. Grease a 9” square baking pan.
  3. Add milk, oil, and eggs to cornbread mix; mix until smooth.
  4. Pour batter into pan and bake 30-45 min, until done and golden brown.
  5. Will make 16 squares.
**Will make 24 cornbread muffins. Bake at 400F for 20-30 minutes or until done and golden brown.
**I added two jalapeños from my garden (diced & seeds removed) and 1/4 bag frozen whole kernel corn for a bit of kick.
    Make Great Pancakes & Cornbread with these Gluten Free Products #Ourhouse #GlutenFree #Recipe
    Gluten-Free Pancakes

    Ingredients:
    • 2/3 cup Our House All-Purpose Flour 
    • 1/2 tsp Baking Powder 
    • 1/4 tsp Baking Soda 
    • 1/4 tsp Sea Salt 
    • 1 Egg beaten 
    • 1/4 cup Milk or dairy alternative 
    • 1 Tbsp Extra Virgin Olive Oil 

    Preparation Instructions:
    1. Begin preheating a griddle to medium or medium-high heat (350 - 375°F).
    2. Combine the flour, baking powder, baking soda and salt in a medium bowl.
    3. In a separate bowl, whisk together the egg, milk and oil.
    4. With a wire whisk, stir wet ingredients into dry ingredients until smooth.
    5. Ladle approximately ⅓ cup pancake batter onto hot griddle. Flip when bubbly and edges are slightly dry, about 3 - 4 minutes per side. Serve hot.

    Picture
    My Thoughts:
    ​I received both an All-Purpose Flour and Cornbread Mix from Our House to try. Wanting to make something special I decided to make pancakes from scratch. My Aunt has been making banana pancakes because she loves pancakes but can not eaten gluten. So I made pancakes with some of the flour I received. I also made some cornbread with jalapenos and corn in it with the mix I received. The Cornbread Mix makes a nice big pan of cornbread or in my case two pans in my cast iron cornbread pan.  When they were done I called my boyfriend to the door and gave him some of each to try. After he asked for a second piece of cornbread I told him that they were gluten-free. He said, "Really? Are you sure?" He didn't have a clue! I shared my masterpieces with my Aunt, too. She loved them both and was happy for the new gluten free options.  I was thrilled with how awesome my cornbread and pancakes turned out.  I'm sure if you don't let them see the box or tell them they are gluten-free they won't know because everything had the same great texture, moisture, flavor, and taste that you enjoy with a product containing gluten.

    These are just two of the great products that this company has. Visit their website to learn more about all the delicious Gluten-Free Products they have to offer.
    Comments

    No Mess Outback Steakhouse's Aussie Cheese Fries Recipe

    9/27/2015

    Comments

     
    Picture
    Artisan Cooking Supply
    Non-Stick Silicone Baking Mats
    Make For
    Easier Food Cooking!

    ​
    Some Bacon Cheesy Fries I made this weekend using Ore-Ida Crispers. After putting it together I just covered for a minute to melt the cheese.
    Artisan Cooking Supply Non-Stick Silicone Baking Mats Make For Easier Food Cooking!
    Details:
    • HOLIDAY baking season is here. Get your mats in time for the Halloween, Thanksgiving, and Christmas baking season. Save yourself tons of time with the easy to clean baking mat.
    • IMAGINE baking with your kids and the feeling of triumph at their success. Our kids love using this mat with the easy placement hearts.
    • SAVE MONEY NOW. Compared to the price of a single roll of parchment paper you can have this resuable mat that has 3000+ uses. Saves the environment and your wallet.
    • KNOW you are protected with their lifetime guarantee. 60 Day -  100% Money back.
    • Cooking mat is FDA approved, LFBG Food Safe, RoHS Green, and ISO 9001 certified. 
    • Measurements and Images for Easy Rolling and Layout of Foods. 
    • Safe for Temperatures from -40°F to 450°F (-40°C to 230°C) 
    • Safe for use in the Oven, Microwave, Freezer, and Dishwasher 
    My Thoughts:
    ​I have several mats for my smaller baking pans and always use them when I cook in oven with those pans for a fast easy clean up. However, I recently received a new 13 X 18 sheet pan and did not have a larger mat for it so I was thrilled that the Artisan Cooking Supply mat fit it perfectly (see picture). We are throwing my parents a fiftieth anniversary party and have already started doing all the baking for the party plus with the holidays just around the corner this mat is a great time, money, and pan saver. Now that I have switched to nonstick skillets and have non stick baking mats for my pans, I no longer purchase parchment paper or non-stick spray. I love silicone mats because can cook whatever I want and my pans stay newer looking longer without having to scrub them like a mad woman. 
    Outback Steakhouse's Aussie Cheese Fries ​: 1 bag of Ore Ida “Simply” Olive Oil-Sea Salt Country Style Fries 1 cup shredded Colby Jack cheese 5 slices bacon 2 green onions, chopped 1/2 cup to 1 cup good-quality Ranch or Honey Mustard dressing salt and pepper ​ Heat oven to 425. Spread fries onto baking sheet with a silicone mat on it. Bake according to package directions. Cook bacon until crispy in skillet and chop. When fries are crispy, remove from oven, season with salt and pepper. Pile fries into the center of the pan. Top with shredded cheese and bacon. Put back in oven for another 3-5 minutes to melt cheese. Remove and top with green onions. Serve with dressing on the side. ​
    Outback Steakhouse's Aussie Cheese Fries
    ​
    I found this awesome copycat recipe on Diary of a Recipe Collector and have adapted it for my needs:

    1 bag of Ore Ida “Simply” Olive Oil-Sea Salt Country Style Fries
    1 cup shredded Colby Jack cheese
    5 slices bacon
    2 green onions, chopped
    1/2 cup to 1 cup good-quality Ranch or Honey Mustard dressing
    salt and pepper
    ​
    Heat oven to 425. Spread fries onto baking sheet with a silicone mat on it. Bake according to package directions. Cook bacon until crispy in skillet and chop.  When fries are crispy, remove from oven, season with salt and pepper. Pile fries into the center of the pan. Top with shredded cheese and bacon. Put back in oven for another 3-5 minutes to melt cheese. Remove and top with green onions. Serve with dressing on the side.
    ​
    Disclosure of Material Connection: This blog receives products or services for free to facilitate the writing of reviews. This post may contain affiliate links, meaning that at no extra cost to you, we get a small percentage of a sale- we use that money to help support our site and our families. Thank you! Regardless, I only recommend products or services I use personally and believe will add value to my readers. I am disclosing this in accordance with the Federal Trade Commission’s 16 CFR, Part 255: Guides Concerning the Use of Endorsements and Testimonials in Advertising.
    Comments

    Happiness is Homemade Link Party

    7/17/2015

    Comments

     
    Happiness is Homemade Link Party where you can find new recipes, be inspired, motivated, and creative.

    Welcome to this week’s Happiness is Homemade Link Party!

    The place where you can find new recipes, be inspired, motivated, and creative. We have it all!

    We love seeing all of your links. Please remember to visit a few other links and share some love and meet some new friends!! Feel free to share the party with others.

    We love new and old friends so let us hear from you!

    Have a fabulous week!


    MOST VIEWED LINKS


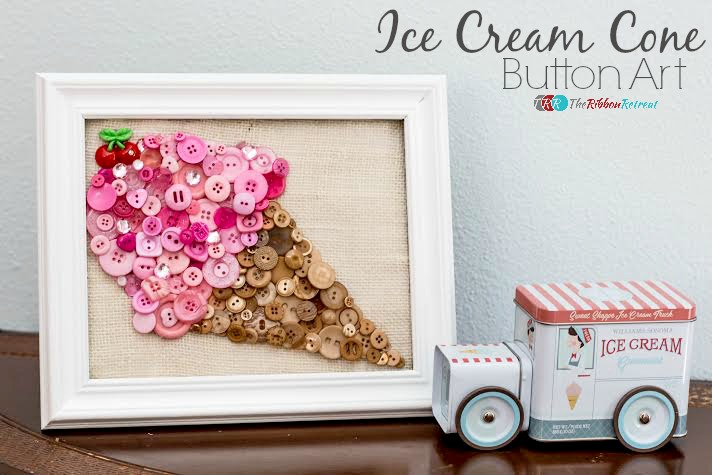
    Ice-Cream-Cone-Button-Art

    Ice Cream Cone Button Art by The Ribbon Retreat


    Bill Watterson quote

    Life Is Not A Chore...by Nimble Note


    CD.DVD-Clocks-SQ

    Make a Clock from a CD/DVD by Our Peaceful Planet


    Wandering Soul

    Wandering Soul by Life of a Georgia Artist


    MEET YOUR HOSTS


    Brittany from Mommy On Demand

    Mommy On Demand | APeekIntoMyParadise.com #HappinessIsHomemade Link Party

    | | | | BLOGLOVIN


    Cathy from A Peek Into My Paradise

    APeekIntoMyParadise Button

    | | | | BLOGLOVIN


    Lisa from Blogghetti

    badge
    | BLOGLOVIN | | | | INSTAGRAM


    MEET OUR JULY CO-HOSTS


    Paula from PaulaMS' Giveaways, Reviews, & Freebies

    PaulaMS Giveaways Reviews and Freebies - July

    | | | BLOGLOVIN | INSTAGRAM


    Jay from Jay Tried and True

    Janae Jay Tried and True - July

    | |


    Pamela from Growing Up In 70s

    Pamela Growing up in the 70s - July

    | | | | BLOGLOVIN | INSTAGRAM


    Heidi from Heidi's Wanderings

    Heidi - July

    | | | | BLOGLOVIN


    Linda from A Labour of Love

    Linda Labour of Love - July

    | | | | BLOGLOVIN | INSTAGRAM


    Noel from Apron Free Cooking

    sm Noel Lizotte Profile

    | | |


    Do you have a blog and are interesting in Co-hosting Happiness is Homemade?

    Simply fill in the Rafflecopter for your chance to win a co-hosting spot with us!! FOUR lucky winners will co-host the Happiness is Homemade Link Party for the following month! You will co-host with us for the entire month! We will also let you have first chance to enter your links into the party for more exposure.

    As always it is free to sign up and helps bring more viewers to your page!

    Now that's enough talking let's get this party started


    Happiness is Homemade Link Party where you can find new recipes, be inspired, motivated, and creative.

    The rules are really simple! Make sure you visit a few other blogs and make some new friends along the way. Feel free to link up your favorite recipes, crafts or your latest DIY project. We want you you share it all! As always, please make sure to follow your hosts and co-hosts!! Link up your posts, make some friends, and earn the chance to be featured at Happiness Is Homemade Link Party! We will feature the favorite posts each week! Disclaimer: Adding your link to this link party gives permission to A Peek Into My Paradise, Mommy On Demand and Blogghetti, along with co-hosts, guest hosts, and participants of Happiness Is Homemade, to share your posts and pictures via social media and as features, roundups, etc. with an explicit link back to your original source. Therefore, linking up you agree to allow us to use your images on each of our blogs in features relating to Happiness is Homemade Link Party.

    An InLinkz Link-up
    Comments

    Link up your Newest Recipe, DIY, or Craft Post in This Week's Happiness is Homemade Link Party!

    7/12/2015

    Comments


    Happiness is Homemade Link Party!

    Welcome to this week’s Happiness is Homemade Link Party!

    We love seeing all of your links. Please remember to visit a few other links and share some love and meet some new friends!! Feel free to share the party with others.

    We love new and old friends so let us hear from you!

    Have a fabulous week!


    MOST VIEWED LINKS

    mojito5-700x700

    Best Mojito Recipe by Jo Lynne Shane


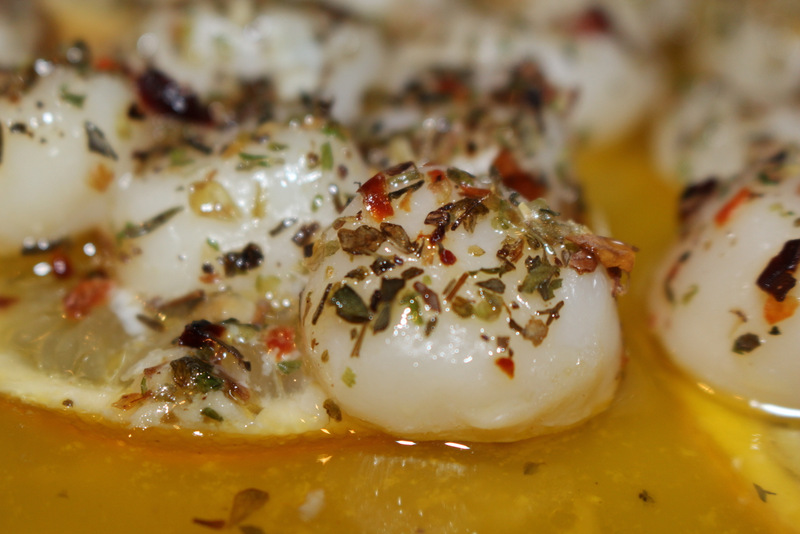
    Prawns-butter-baked-chili-herbs-whatsonthelist

    Easy Entertaining Butter Baked Herb Scallops by What’s on the List


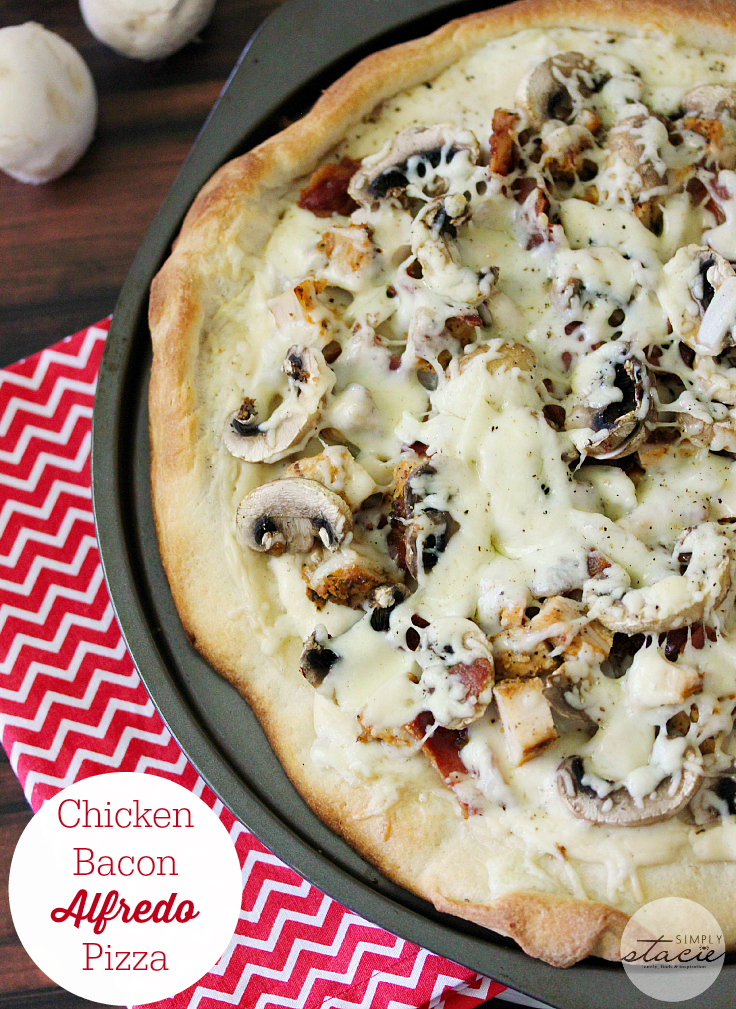
    alfredo-pizza-3

    Chicken Bacon Alfredo Pizza by Simply Stacie


    IMG_4695

    How to Make a Barrel of Candy Cake by Alwayz Bakin


    MEET YOUR HOSTS


    Brittany from Mommy On Demand

    Mommy On Demand | APeekIntoMyParadise.com #HappinessIsHomemade Link Party

    | | | | BLOGLOVIN


    Cathy from A Peek Into My Paradise

    APeekIntoMyParadise Button

    | | | | BLOGLOVIN


    Lisa from Blogghetti

    badge
    | BLOGLOVIN | | | | INSTAGRAM


    MEET OUR JULY CO-HOSTS


    Paula from PaulaMS' Giveaways, Reviews, & Freebies

    PaulaMS Giveaways Reviews and Freebies - July

    | | | BLOGLOVIN | INSTAGRAM


    Jay from Jay Tried and True

    Janae Jay Tried and True - July

    | |


    Pamela from Growing Up In 70s

    Pamela Growing up in the 70s - July

    | | | | BLOGLOVIN | INSTAGRAM

    Heidi from Heidi's Wanderings

    Heidi - July

    | | | | BLOGLOVIN


    Linda from A Labour of Love

    Linda Labour of Love - July

    | | | | BLOGLOVIN | INSTAGRAM


    Noel from Apron Free Cooking

    sm Noel Lizotte Profile

    | | |


    Do you have a blog and are interesting in Co-hosting Happiness is Homemade?

    Simply fill in the Rafflecopter for your chance to win a co-hosting spot with us!! FOUR lucky winners will co-host the Happiness is Homemade Link Party for the following month! You will co-host with us for the entire month! We will also let you have first chance to enter your links into the party for more exposure.

    As always it is free to sign up and helps bring more viewers to your page!

    Now that's enough talking let's get this party started

    HIH 3 Hosts

    The rules are really simple! Make sure you visit a few other blogs and make some new friends along the way. Feel free to link up your favorite recipes, crafts or your latest DIY project. We want you you share it all! As always, please make sure to follow your hosts and co-hosts!! Link up your posts, make some friends, and earn the chance to be featured at Happiness Is Homemade Link Party! We will feature the favorite posts each week! Disclaimer: Adding your link to this link party gives permission to A Peek Into My Paradise, Mommy On Demand and Blogghetti, along with co-hosts, guest hosts, and participants of Happiness Is Homemade, to share your posts and pictures via social media and as features, roundups, etc. with an explicit link back to your original source. Therefore, linking up you agree to allow us to use your images on each of our blogs in features relating to Happiness is Homemade Link Party.
    An InLinkz Link-up
    Comments

    Easy Fried Green Tomatoes Recipe

    7/11/2015

    Comments

     
    Picture
    It's not summer until you've had fried green tomatoes!

    Picture

    I've canned so many jars of tomatoes this year that they are two cases sitting at my dinning room table. Waiting for me to use some of what I have in cupboards to make room for them. But I hadn't taken the time to fry up some of the green ones that I had picked from the garden until today. My neighbors were generous enough to share some of their eggs with me so I used some guinea hen eggs to make my tomatoes.

    Picture

    You can also fry up red tomatoes with this easy recipe but make sure they are not over ripe or they will be mushy.

    Picture

    Fried Green Tomatoes

    Ingredients:

    Picture

    Directions:

    1.  Slice tomatoes 1/4 inch thick. Discard the ends.

    Picture

    2.  Whisk eggs and milk together in a medium-size bowl.

    Picture

    3.  Scoop flour onto a plate or large bowl.

    Picture

    4.  Mix cornmeal, bread crumbs and salt and pepper on another plate or large bowl. I like a bit of spice so I used Hot & Spicy bread crumbs. You can also add a bit red or cayenne pepper to the mixture if you want to add some heat.

    Picture

    5.  Pour oil into a large skillet or saucepan and heat to 350 degrees. I used coconut oil but you can use any oil that you like. I prefer to use a saucepan with about an inch of oil and do 3 tomato slices at a time.

    Picture

    6.  Dip tomatoes into flour to coat. 
    7.  Then dip the tomatoes into milk and egg mixture.
    8.  Dredge in breadcrumbs to completely coat.

    Picture

    9.  Place tomatoes into the pan in batches of 3 to 5, depending on the size of your skillet. Do not crowd the tomatoes, they should not touch each other. When the tomatoes are browned, flip and fry them on the other side.
    10.  Drain on paper towels and sprinkle hot tomatoes with salt.

    Picture

    ENJOY!!!!
    Comments

    I'm Co-Hosting! Happiness is Homemade Link Party - Add Your Recipe, DIY, & Craft Links TODAY!

    7/5/2015

    Comments


    HIH 3 Hosts

    Welcome to this week’s Happiness is Homemade Link Party! We love seeing all of your links. Please remember to visit a few other links and share some love and meet some new friends!! We love new and old friends so let us hear from you!

    Enjoy your holiday weekend!

    MOST VIEWED LINKS

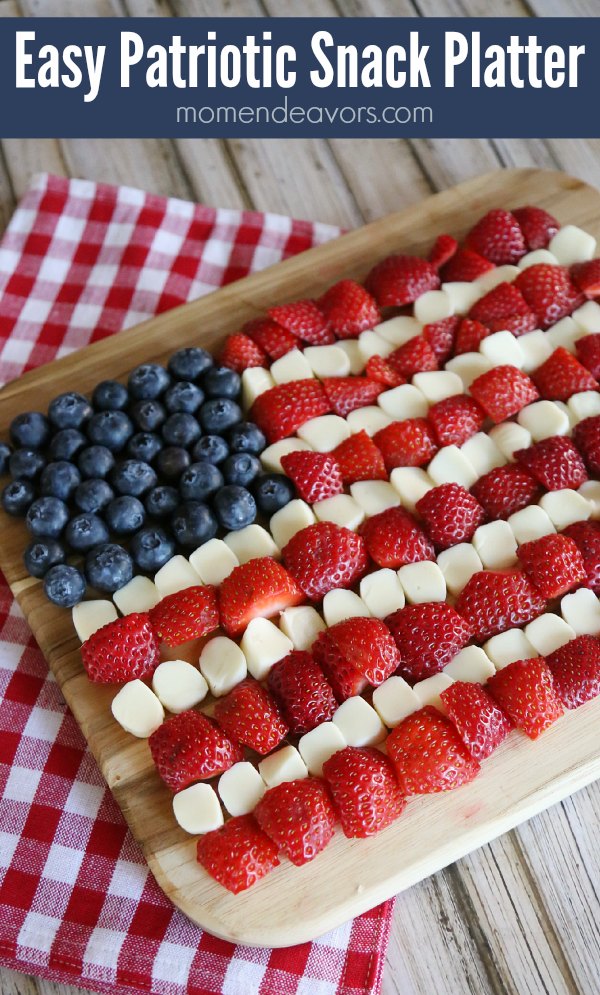
    Healthy-Patriotic-Snack

    Easy Patriotic Snack Platter by Mom Endeavors

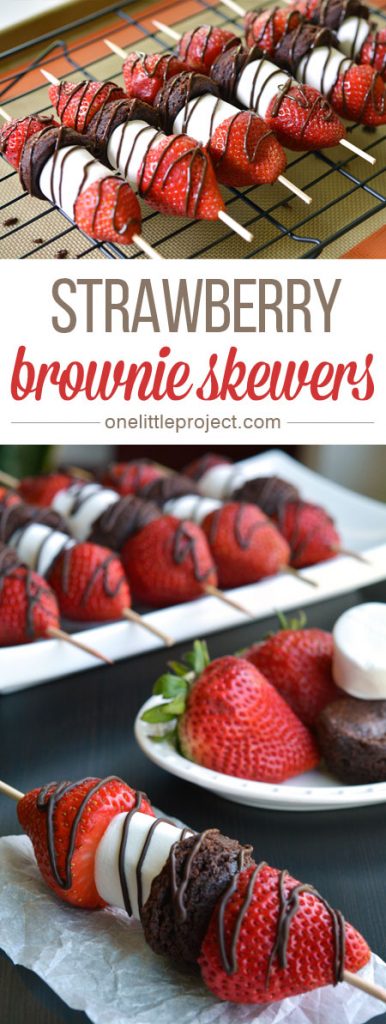
      Strawberry-Brownie-Skewers4

    Strawberry Brownie Skewers by One Little Project

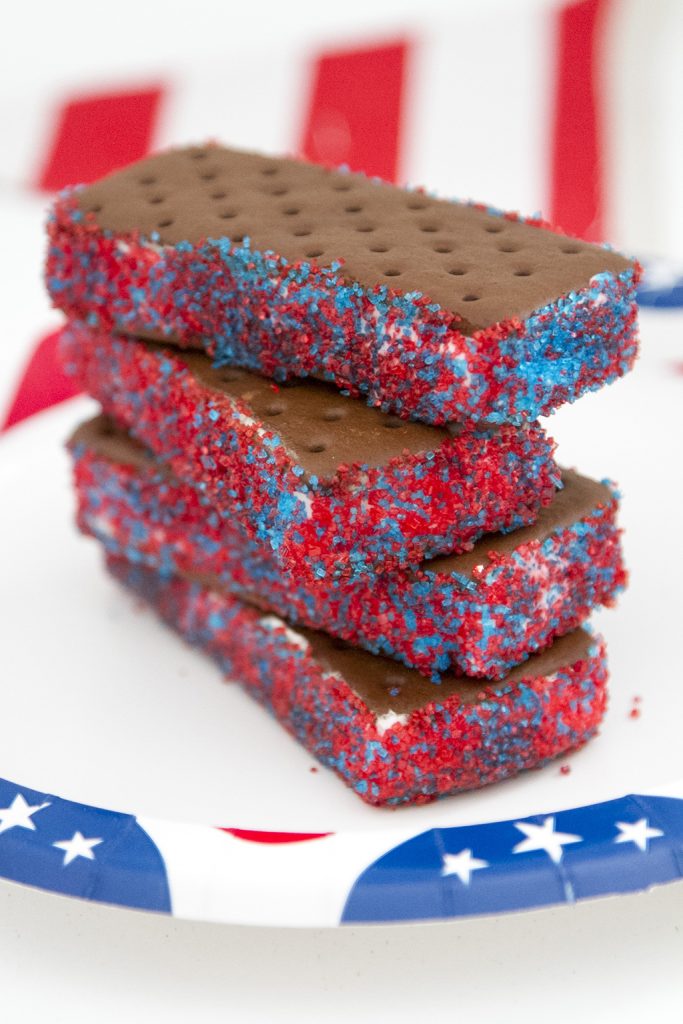
      IMG_7815

    Red, White, and Blue Ice Cream Sandwiches by BonBon Rose Girls


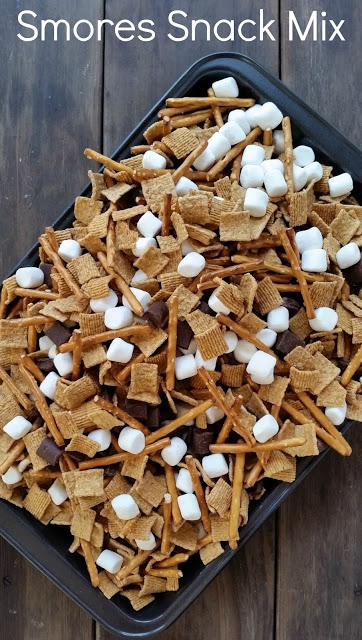
    20150617_115043-1
    Smores Snack Mix by Three Kids and a Fish


    MEET YOUR HOSTS


    Brittany from Mommy On Demand

    Mommy On Demand | APeekIntoMyParadise.com #HappinessIsHomemade Link Party

    | | | | BLOGLOVIN


    Cathy from A Peek Into My Paradise

    APeekIntoMyParadise Button

    | | | | BLOGLOVIN


    Lisa from Blogghetti

    badge
    | BLOGLOVIN | | | | INSTAGRAM


    MEET OUR JULY CO-HOSTS


    Paula from PaulaMS' Giveaways, Reviews, & Freebies

    PaulaMS Giveaways Reviews and Freebies - July

    | | | BLOGLOVIN | INSTAGRAM


    Jay from Jay Tried and True

    Janae Jay Tried and True - July

    | |


    Pamela from Growing Up In 70s

    Pamela Growing up in the 70s - July

    | | | | BLOGLOVIN | INSTAGRAM

    Heidi from Heidi's Wanderings

    Heidi - July

    | | | | BLOGLOVIN


    Linda from A Labour of Love

    Linda Labour of Love - July

    | | | | BLOGLOVIN | INSTAGRAM


    Noel from Apron Free Cooking

    sm Noel Lizotte Profile

    | | |


    Do you have a blog and are interested in Co-hosting Happiness is Homemade?

    Simply fill in the Rafflecopter for your chance to win a co-hosting spot with us!! FOUR lucky winners will co-host the Happiness is Homemade Link Party for the following month! You will co-host with us for the entire month! We will also let you have first chance to enter your links into the party for more exposure.

    As always it is free to sign up and helps bring more viewers to your page!

    Now that's enough talking let's get this party started

    HIH 3 Hosts
    The rules are really simple! Make sure you visit a few other blogs and make some new friends along the way. Feel free to link up your favorite recipes, crafts or your latest DIY project. We want you you share it all! As always, please make sure to follow your hosts and co-hosts!! Link up your posts, make some friends, and earn the chance to be featured at Happiness Is Homemade Link Party! We will feature the favorite posts each week! Disclaimer: Adding your link to this link party gives permission to A Peek Into My Paradise, Mommy On Demand and Blogghetti, along with co-hosts, guest hosts, and participants of Happiness Is Homemade, to share your posts and pictures via social media and as features, roundups, etc. with an explicit link back to your original source. Therefore, linking up you agree to allow us to use your images on each of our blogs in features relating to Happiness is Homemade Link Party.
    An InLinkz Link-up
    Comments

    Easy Baked Apple Crisp Recipe

    7/3/2015

    Comments

     
    Easy Baked Apple Crisp - I had some apples that needed to be used so I came up with this recipe to use them. The small ramekin makes it is the perfect size for portion control, children, and parties.
    I had some apples that needed to be used so I came up with this recipe to use them. The small ramekin makes it is the perfect size for portion control, children, and parties.
    INGREDIENTS:
    Filling:
    3 cups thinly sliced tart apples
    1/2 tablespoon lemon juice
    1/4 cup white sugar
    1 tablespoon all-purpose flour
    1 teaspoon Apple Pie Spice
    Optional Add-Ins:
    1/4 cup raisins
    1/4 cup chopped walnuts
    Topping:
    1/4 cup flour
    1/4 cup oats
    1/4 cup brown sugar (tightly packed)
    1/2 teaspoon Apple Pie Spice
    2 tablespoons butter (softened)

    Try making it with peaches, too!
    Check out this Easy Homemade Apple Crisp #Recipe
    Filling Directions:
    1. In a large bowl place sliced apples and sprinkle with lemon juice. 
    2. In a small bowl, mix together sugar, flour, and Apple Pie Spice. 
    3. Sprinkle mixture over apples. Toss until apples are evenly coated. Stir in raisins and walnuts if desired. 
    4. Spoon mixture into 4 ramekins or oven safe dish. 
    5. Add 1/4 inch of water to baking pan and place ramekins in the pan. 
    Check out this Easy Homemade Apple Crisp #Recipe
    Topping Directions:
    1. In a small bowl mix together flour, oats, sugar, butter, and Apple Pie Spice. 
    2. Spread mixture over apple filling. Cover top loosely with aluminum foil.
    3. Bake in preheated 375 degree oven for 25 minutes.
    4. Remove foil and Bake for 20 minutes or until done
    Check out this Easy Homemade Apple Crisp #Recipe
    Caution: Filling is very hot!
    Let cool a bit before enjoying.

    Comments

    Pillsbury Pepperoni Pizza Cake Recipe

    6/5/2015

    Comments

     
    Picture
    Pizza Cake!

    Ingredients:

    2 cans Pillsbury™ refrigerated classic pizza crust
    1 1/2 cups Muir Glen™ organic pizza sauce (from 15-oz can)
    3 cups shredded mozzarella cheese (12 oz)
    1 cup sliced pepperoni
    1 tablespoon butter, if desired

    Directions:

    Heat oven to 400°F. Lightly spray large cookie sheet with cooking spray or drizzle with olive oil.


    Picture
    Measure diameter of tall-sided ovenproof pan. (Pan used was 6-inch in diameter with 4-inch high side.) Unroll 1 can of dough onto work surface; press out into thin layer. Cut out 3 (6-inch) rounds; place on cookie sheet. Bake 8 minutes. Remove from cookie sheet to cooling rack; cool.


    Unroll remaining can of dough; cut 2 additional (6-inch) rounds from long edge of dough, leaving opposite side untouched. Place rounds on cooled cookie sheet. Bake 8 minutes. Remove from cookie sheet; cool.

    Picture
    Meanwhile, line pan with cooking parchment paper so that ends of paper stick up and out of pan. Cut long strip of dough at least 1/2 inch wider than height of pan. Carefully drape long strip of dough around inside edge of pan to line, leaving 1/2 inch hanging over outside edge of pan and bottom of pan open. Pinch seam to seal.

    Picture
    Carefully place 1 partially baked crust round in bottom of pan. Spread pizza sauce over crust; top with pepperoni slices and sprinkle with mozzarella cheese (when cheese melts, crust above will stick to it). Repeat to make 3 more layers. For top layer, place last crust over cheese; sprinkle with remaining cheese and arrange remaining pepperoni on top.

    Picture
    Fold overhanging dough over top layer of pizza cake to make a raised crust edge.

    Picture
    Bake 20 to 25 minutes or until dough around pizza cake is fully cooked. (To test, carefully pull up parchment paper to raise pizza cake out of pan.) Once completely baked, cool in pan 5 minutes. Remove pizza cake from pan; brush crust with butter. Use sharp knife to cut slices like you would a cake.

    Expert Tips:
    • If the top crust begins to get too dark, place a strip of foil around the crust edge to prevent it from burning.
    • Use any sort of pizza toppings you like, or alternate each layer of pizza with a different set of toppings.
    • Use a deep spring form pan to  make removing easy
    • All 5 layers fit in a 2 1/2 quart casserole dish that is 8 inches in diameter and 3.5 inches deep perfectly.

    • You may need a third can of of pizza dough
    Picture


    PLEASE SIGN UP!
    It doesn't cost you anything and I earn
    $10 for each 30-Day Free Trial until 6/30
    THANK YOU!
    Comments
    <
      PaulaMS' Giveaways, Reviews, & Freebies - 
      Blogging about Freebies, Giveaways, and Product, Book, & Service Reviews
      Go To Blog

      Page 1
      Page 2
      Page 3
      Page 4
      Page 5
      Page 6
      Page 7
      Page 8
      Page 9
      Page 10

      Go To

      Giveaways

      Freebies

      Reviews

      Blogger
      Opps


      Recipes
      Picture
      Top Giveaway Blogs

      Your Help Is Needed
      Please
      Vote for us Daily!


      Picture

      Subscribe


      Follow Me

      Follow on Bloglovin http://www.bloglovin.com/paulastewart754
      Follow this blog

      Support This Blog
      CLICK An Ad


      Womens Wood Watches


      Educents

        Contact Me

      Submit

      Grab A Button

      PaulaMS' Giveaways, Reviews, & Freebies

      Leave A Comment
      I will reciprocate

      PaulaMS' Giveaway Grab Bag Linky
      Giveaway Grab Bag Linky
      #ShareSwapHop

      Blog
      Roll Call
      Hops & LInk-Ups

      HOMESCHOOL GROUP
      Subscribe to ABEKAFORSALE

      Visit

      Joyful Gifts By Julie


      THURSDAY
      Growing Circles Hop


      Giveaway Center


      The Ultimate Linky

      More great sites to find and list giveaways
      Infinite Sweeps
      Sweepstakes-Search.com
      Sweeties Sweeps
      Giveaway Monkey
      and
      Contest Heat

      Archives

      March 2016
      February 2016
      January 2016
      December 2015
      November 2015
      October 2015
      September 2015
      August 2015
      July 2015
      June 2015
      May 2015
      April 2015
      March 2015
      February 2015
      January 2015
      December 2014
      November 2014
      October 2014
      September 2014
      August 2014
      July 2014
      June 2014
      May 2014
      April 2014
      March 2014
      February 2014
      January 2014
      December 2013
      November 2013
      October 2013
      September 2013
      August 2013
      July 2013


    Create a
    Powered by
    Create your own free website

    Start your own free website

    A surprisingly easy drag & drop site creator.
    ✕